Tuesday, December 14, 2010

The Grand Tootsie Train Adventure

My grandson, Matthew, I was told, wanted trains for his third birthday in November. Real Trains, thank you, not that "Thomas the Tank Engine" stuff. Well, what could be a real-er train than to take him on a train ride??? So . . . . . . on Sunday, 12 December 2010, Matthew and Tootsie embarked on the Grand Tootsie Train Adventure.

We drove 45 miles east of Gainesville to Palatka, where we caught the Silver Meteor headed south to our chosen destination, Winter Park. It hasn't rained in yeah however long but it had to chose that particular day. Thankfully it was just a misty sort of rain but it also was blowing and cold as whiz! Since it was so cold and wet, I wasn't inclined to linger outside to take pictures of the train station, so that will have to be an adventure for another day. Unfortunately, it was that same cold misty rain the whole day until we arrived back in Palatka, where the sun was shining! :o/

The train ride was about an hour and a half long, just long enough to go to the dining car for lunch. Didn't think to take a picture of that, either, but I did take a picture of Matthew shortly after we embarked.


The train station in Winter Park is the same one which was there when I was a little girl, and is right in the middle of town. When we stepped off the train, we were literally in the middle of the street.


The conductor thought it was pretty cute that Matthew wanted "real trains". After we arrived and the train was ready to go on its way, he put his conductor hat on Matthew so he could shout "All aboard!" for him. However, Matthew really didn't see the necessity of such suspect behaviour as that and he declined the invitation. He rather got lost in the hat.


Between the train station and the main street of Winter Park is a park several blocks long with benches and fountains. Not the best entertainment on a cold, misty day, even if it is a nice park. The smaller of the two fountains is beside Matthew's left ear. The second picture is the other fountain. Not bad for being taken out the train window as we were leaving!


After my mother and her parents moved to Winter Park in 1935, her father opened a jewelry store on Park Avenue. If I am not mistaken, that shop was to the right of center in this picture. The fountain at Matthew's left ear in a previous picture is also in this picture. It is a war memorial. PawPaw's shop, if I am correct, was about where the red awning is to the right of the picture.


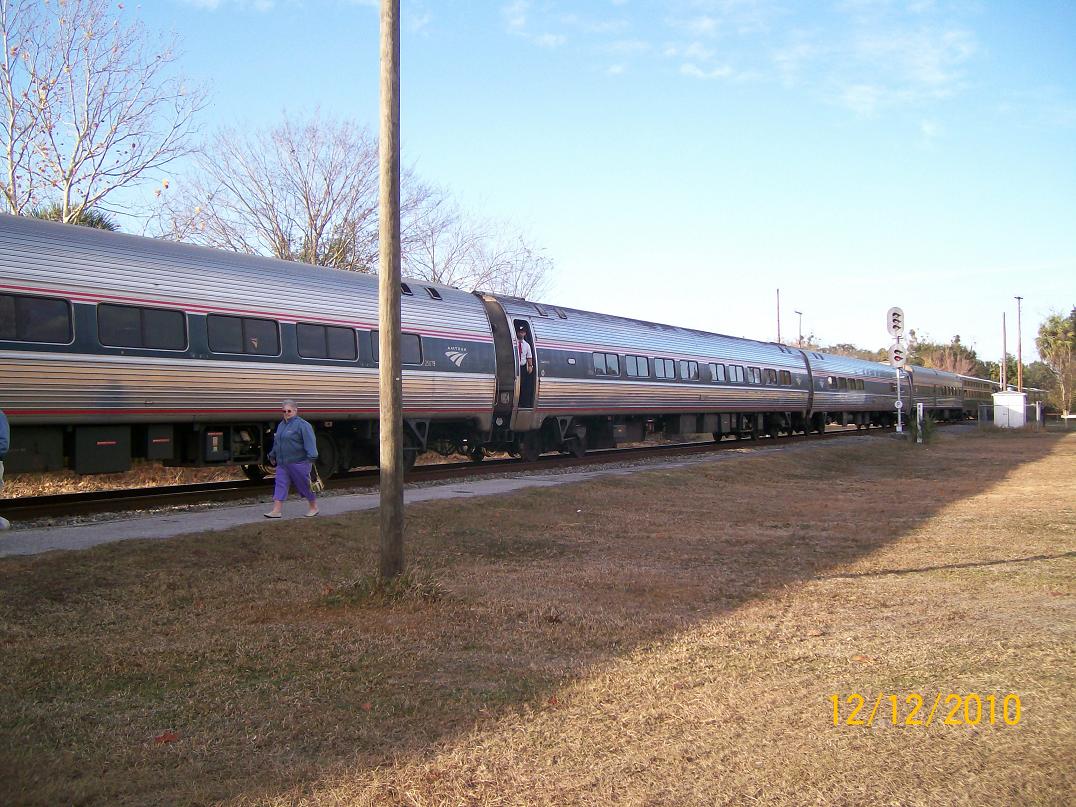
Alas, all things must come to an end, our trip being no exception. We waited on the platform as the Silver Meteor chugged slowly round the bend into view.


I was quite fascinated by the double-decker cars. As near as I can figure, those are the sleeper cars. The lower level is for sleeping, the regular seats occupying the upstairs.


At last we arrived back in Palatka.


Matthew was one tuckered out little boy - he was asleep before we even were out of Palatka on the final leg home to Gainesville. He does look like he enjoyed his Grand Tootsie Train Adventure . . . . . . .


. . . . . . even if Thomas did go, too!

Saturday, October 16, 2010

And Some I Sent

And now, some I have sent over the years. Some of you may be very thankful I have not been your partner. :o) When I first joined the swap, we made two blocks each month, so the first two pictures were a pair. They were the very first blocks I made in the swap, and the request was simply pinks and greens. I had a great time making them but I'm not sure the recipient was as enthused! As you will see farther on, I have slowed the pace since them.


Don't know why I didn't take a picture of this one when it was finished but, for whatever reason, I didn't. She wanted flowers with embroidered centers so I embroidered them with beads and stuff. I wish I had taken a picture since she said she never received the block. :o(((


She wanted a wonky house. This is as close as I could get!


Friday, October 15, 2010

Everything's Coming Up Roses (And Leaves)

For an uncounted number of sporadic terms now, I have taken a metalsmithing class at the college where I work. Much classier, of course, to call it silversmithing except that one is not limited to working in silver. I figured it would be fun to show you a few of the things I have made. You will be seeing more of some of these in another post, hopefully soon, so I won't explain right now what they are all about. You'll just have to stay tuned for further developments.

These pieces were made by a process called lost wax casting. The piece is created in wax then encased in a type of plaster, which is heated in a kiln until the wax burns out, hence is "lost", and molten silver is poured into the cavity left in the plaster. Various types of wax are available ready-made but none were suitable for what I wanted to do, which was to model the roses as one would do with clay. There just isn't a type of wax available that would do that, so I had to create my own. Hmmm . . . . . . . maybe I should market it . . . . . . .

These are all made of sterling silver. Not the traditional .925 sterling everyone is familiar with, these are Argentium sterling silver. The major advantage of Argentium sterling is that it doesn't tarnish. Well, it tarnishes exceedingly slowly, always a lovely thing with silver!

The picture shows the roses as they came out of the mold - there are three of them which are all on a common "stem". I later cut them apart. The leaves also were made into a sort of a tree-looking affair to cast and were later cut apart. The wax I created produces that matte finish on the roses. The leaves were made of commercial casting wax, so are smoother and therefore shinier. I polished the roses, which removed the matte and made them shiny, but I didn't like the result so unpolished them again, after which they looked more like the leaf in the third picture.


The picture below shows the third rose, which is behind the two in the above picture. It shows what the roses actually look like without the lamp shining on them. This picture and the one below it will give you just a hint of the end product. :o)


The brownish color in the first picture is due to the lighting when the picture was taken. The roses really are silver-looking, as in the second picture. Well, at least they were . . . . . before I baked them in the oven. Now they have a lovely bronze-ish color. Haven't photographed them since I did that, but will do that shortly.

As I said, stay tuned for pictures of the finished project. Yes, thank you, it was finished this past February. Our professor had a show of her work in the gallery of the college President's office and kindly included work by three of her students, this project being among them.


Quilt Blocks Received

Since I have so many quilty friends online now, I thought I would share some of the quilt blocks I have been fortunate enough to receive over the past four years. Hard to believe it has been so long since I originally joined the Quilt Block Swap. Time sure flies when one is having so much fun! I have not photographed very one I sent or received but a number of them I did, so I hope you will enjoy this selection of them.


Tuesday, October 05, 2010

Found a picture

In looking around that the quilt block swap blog archives, I found a picture I posted of Dad's quilt. Our local quilt guild hosts a quilt show every other year and I entered Dad's quilt in the last show. The bottom is cut off a wee bit but otherwise it is pretty much all there, including the little things I added in after the fact.

Saturday, October 02, 2010

Round Robin swap

October begins the third month my mom, Joy, and I have been involved in a round robin swap with four other ladies. We each made our own center block, which was sent to the next person in the swap. That person will add a round and send it to the next person, who will add the next round, etc. After the sixth person adds the final round, we will each receive our own quilt top back. Theoretically, it will only need to be made into a finished quilt at that point.

If anyone would like to check out the blog for the swap, the address is Roundrobinswap.blogspot.com.

Feel free to comment!

Wednesday, September 29, 2010

My One and Only

This is the first quilt I have ever made – indeed, the ONLY one I have ever made! - and it was for my dad's 80th birthday in November 2006. He is a horticulturist and Master Gardener, so when I found a pattern for a vegetable patch on QNM (actually, it may have been McCall’s) website, I knew it was the one. Unfortunately, the pattern is for a wall hanging but I wanted a quilt for him to snooze under in the afternoons. Just enlarging it was my first thought. But....my mom said, "Well, you know it has to go from his nose to his toes" so that sent me scurrying back to the ol' sketchbook. And this is what I came up with.....

Unfortunately, my working sketch has managed to escaped from the original posting on the Quilt Block Swap blog. Some fine day, when I find that sketch again, I will scan it again and insert it here, as it originally was. In the meantime, those who might not choose to wait until eternity for it to show up here, you can visit the address below, click on 2006 in the archives, and scroll about halfway down the page. I will still leave the description about it in this post. Picture it in your imagination as you read and see how close you come to the actual design. :o)

http://quiltblockswap.blogspot.com


The blocks at the top and on the right are vegetables from the pattern I bought, a cart, and a barn, all of which are paper pieced, as well as some other elements.


The diagonal stripes and the octagon in the center are cobblestone paths. The lower diagonal stripes I decided not to put in. The ones going out to the sides have been ripped out because the fabric I bought for the back (before I had a real clear picture what the final product would be) was 6" too short, and that was a less expensive fix than buying more backing fabric!


The pictures below are the various sections which are more or less complete. I had it laid out on my folks' king-size bed, which is higher than most. Since I am pretty short, some are taken standing right beside it, but others are taken when I was standing on the bed looking down at it. Thus the weird angles in some of the pictures!


This first is the whole back yard.


This is the left side, more close up--sorry for the odd angle. At the very top is a strip of fabric printed with sunflowers.Those brown things are squirrels from a printed panel which I raw-edge appliqued on. Between the onions and the beets is a scarecrow from the same panel.


On the far left below the path, the speckled green is a swamp and the speckles are butterflies and dragonflies (buttons), stuff like that.


On the right side, the lighter green irregular pieces beside the path are bunnies sitting in the grass, which I appliqued on. The brown things above the bunnies on the right are old-fashioned beehives. In the way-upper right corner are some deer from a pillow panel. They don’t show in this picture but can be seen in the almost-completed picture. On the barn door, I embroidered "MDJ"--short for "More Damn Junk", one of my dad's favorite (or at least frequently used!) phrases all my growing up years. After I left home, he put up a pole barn for a garage and storage area, and put "MDJ" on the door with a street number.....hence the MDJ on this barn door.


This is 2/3 of the front yard, and looks so odd because it was taken upside down and lost something in the rotation.

There is another picture of the left side of the yard which I tried umpteen times to insert here and it just refused to put it in for some unknown reason. It shows the beginnings of the house to go in the middle, the fabric for the stream along the left side by the swamp, and some chenille sheep I made from 5 layers of flannel. Oh well, I guess you'll have to wait for the picture of the finished product to see them.


This is the front yard on the right side. Those white spots are daisy buttons.


What's a Florida house without flamingo yard trash??? If you could zoom in, they are playing music with guitars and enjoying long cool ones. Daddy doesn't really have any in his yard but they were too cute to pass up. :o)

Along the right edge is yet another piece cut from a panel (my mother, who has sewn all her life, is a veritable treasure trove of fabrics!) and is quilts hanging on a fence.


The above was written in 2006 as I was making the quilt. Below is, well, not quite the finished quilt but close to it. The only “quilting” is machine stitching in the ditch (right in the seam lines) along the various components of the house, vegies, driveway, and swamp. The grass in the front yard is tied with a lighter green crochet cotton. All those shiny lines in this picture are the safety pins holding it all in place, which were, of course, removed after all the stitching and tying were finished. Other that than, the picture below is the quilt as it was given to Dad for his birthday – yes, I actually finished it in time!!! And no, the shoes peaking out the bottom are not part of the quilt. They are attached to the quilt hanger. ;o)


And here is the man with his quilt.


There were some other things added after the fact but I do not have a picture of the quilt as it is today. Next time I visit them, I will take a new picture, as well as some close-ups, so stay tuned.


Monday, July 05, 2010

Family picture

A month ago, when my brother was visiting from Tucson, I had family pictures taken and decided to post one here. It was taken two weeks before my granddaughter's first birthday. She apparently has decided that turning a year old made her eligible to walk- just last week she started taking her first unassisted steps!


The duo responsible for the whole thing . . . . . .


My boys - Brian, on the left, is the father of the two mini-folk, and Timothy is on the right - and grandboy, Matthew . . . .


And my girls. My lovely daughter-in-law, Lauren, is the mama of the wee ones. We got caught in the rain (which is why I look like a drowned rat!) and we girls took refuge in the resident gazebo.
And the star of the show is . . . . . Abigail!